LAMP環境(Linux + Apache + MySQL + PHP)が揃ったので、WordPress(ブログサーバ)を使えるようにする。尚、LAMP環境のインストールについては、関連記事を参照。
Ubuntu 16.04では、WordPressはaptからインストールできるが試したら英語だったので(変更もできるようですが)、WordPress 日本語を入手しインストールする。
追記(2018/6/2)
Ubuntu 18.04 LTS Serverでも動作する事を確認した。

WordPressの取得
任意のフォルダで下記コマンドを実行。日本語WordPressのソース一式を取得し、任意のフォルダに展開。
$ wget http://ja.wordpress.org/latest-ja.tar.gz
$ tar xvf latest-ja.tar.gz
WordPressの設定
展開したフォルダに移動し、wp-config.phpファイルの作成、DB情報を編集登録。
$ cd wordpress/
$ cp wp-config-sample.php wp-config.php
下記の箇所を編集
$ nano wp-config.php
// ** MySQL 設定 - この情報はホスティング先から入手してください。 ** //
/** WordPress のためのデータベース名 */
define('DB_NAME', 'wordpress');

/** MySQL データベースのユーザー名 */
define('DB_USER', 'phpmyadmin');

/** MySQL データベースのパスワード */
define('DB_PASSWORD', 'password_here');
WordPress関連ファイルをWebフォルダに設置
展開したファイル一式を、WordPress(apache)から更新やプラグインなどのインストールができるようにwww-dataユーザの権限でコピー。
$ sudo mkdir /var/www/wordpress
$ sudo chown www-data:www-data /var/www/wordpress
$ sudo -u www-data cp -a . /var/www/wordpress/
MySQLの設定
wordpressのDBを作成、ユーザはphpmyadminを利用。
$ sudo mysql -u root -p

mysql> create database wordpress;
Query OK, 1 row affected (0.08 sec)

mysql> GRANT ALL PRIVILEGES ON wordpress.* TO 'phpmyadmin'@'localhost';
Query OK, 0 rows affected (0.02 sec)

mysql> flush privileges;
Query OK, 0 rows affected (0.14 sec)

mysql> exit
Bye
Apacheの設定
下記の/etc/apache2/sites-available/001-wordpress.confファイルを作成。(デフォルにある000-default.confファイルをコピーし作成)
$ cd /etc/apache2/site-available/
$ sudo cp 000-default.conf 001-wordpress.conf
$ sudo nano 001-wordpress.conf
<VirtualHost *:80>
    # The ServerName directive sets the request scheme, hostname and port that
    # the server uses to identify itself. This is used when creating
    # redirection URLs. In the context of virtual hosts, the ServerName
    # specifies what hostname must appear in the request's Host: header to
    # match this virtual host. For the default virtual host (this file) this
    # value is not decisive as it is used as a last resort host regardless.
    # However, you must set it for any further virtual host explicitly.
    #ServerName www.example.com

    ServerAdmin webmaster@localhost
    DocumentRoot /var/www/wordpress

    <Directory "/var/www/wordpress">
        Options FollowSymLinks
        # .htaccess による設定変更を許可
        AllowOverride All
        DirectoryIndex index.php
        Order allow,deny
        Allow from all
    </Directory>

    # wp-config.phpへのアクセスをすべて拒否します。
    <Files wp-config.php>
        order allow,deny
        deny from all
    </Files>

    # Available loglevels: trace8, ..., trace1, debug, info, notice, warn,
    # error, crit, alert, emerg.
    # It is also possible to configure the loglevel for particular
    # modules, e.g.
    #LogLevel info ssl:warn

    ErrorLog ${APACHE_LOG_DIR}/error.log
    CustomLog ${APACHE_LOG_DIR}/access.log combined

    # For most configuration files from conf-available/, which are
    # enabled or disabled at a global level, it is possible to
    # include a line for only one particular virtual host. For example the
    # following line enables the CGI configuration for this host only
    # after it has been globally disabled with "a2disconf".
    #Include conf-available/serve-cgi-bin.conf
</VirtualHost>
設定ファイルを書き換えたら、サイトを有効化しエラーがないか確認。
$ sudo a2ensite 001-wordpress
$ sudo apache2ctl configtest
Ubuntuのデフォルトでは、mod_rewriteが無効になっているので有効化。
$ sudo a2enmod rewrite
Apacheの再起動。
$ sudo service apache2 restart
デフォルトサイトが有効になっている場合は、下記コマンドを実行してから上記を実行。
$ sudo a2dissite 000-default
WordPressの初期設定
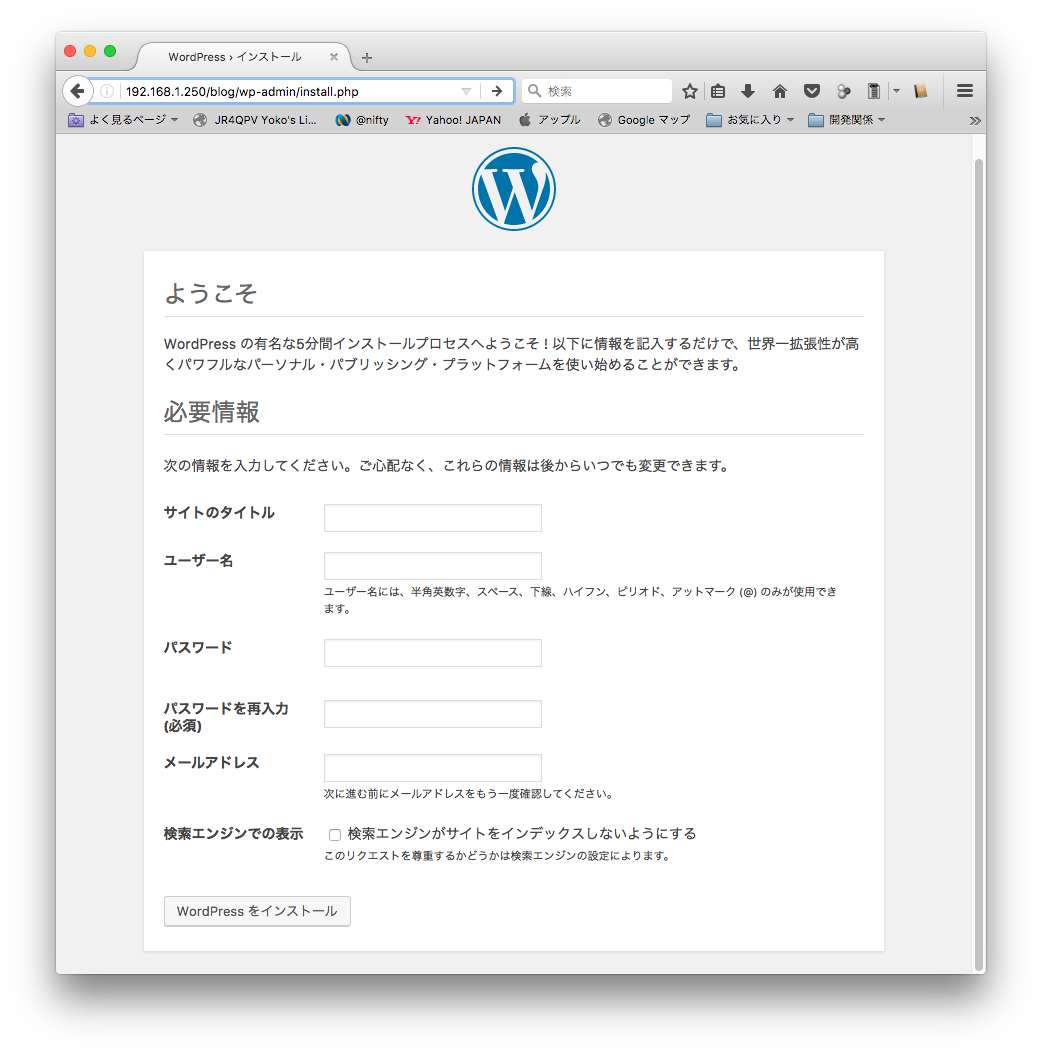
Webブラウザから下記URLにアクセス
http://[サーバIP]/wp-admin/install.php
サイト名、ユーザ名、パスワード、メールアドレス入力画面を入力。
最後のチェックボックスはチェックを入れることで検索エンジンに引っからないよう。

外部インターネットからアクセス
ルータの静的NAT設定は必要ではあるが、外部インターネットからWordPressへのアクセスを試したら、最初アクセスできなかった。
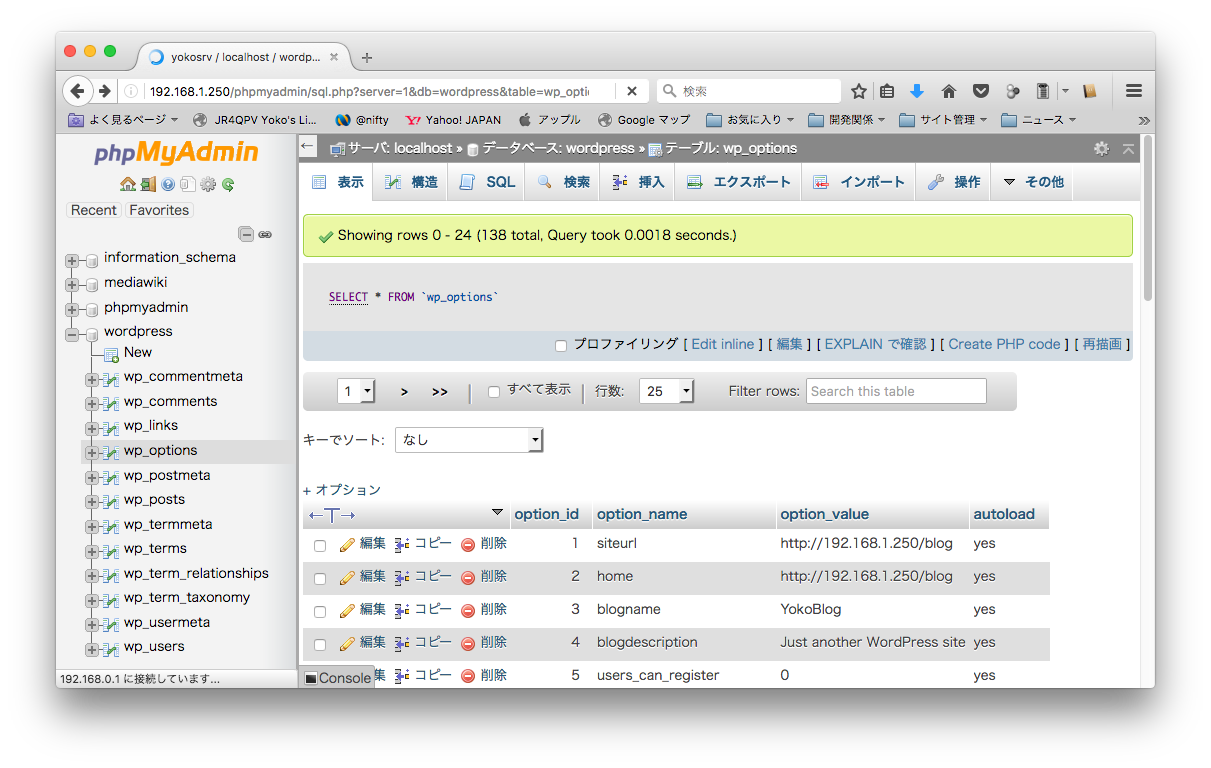
どうやらローカルIPアドレスのページを開こうとしているようだった。インストールする時のURLは外部インターネットから名前解決できるURLにするべきだったようだ。再インストールしてもよいが、下記箇所のMySQLのテーブルを修正すればOKになった。

phpMyAdminから修正した。wp_optionテーブルの、siteurlとhomeのフィールドがローカルIPアドレスになっていたが、下記のようなインターネットからも名前解決できるURLに変更。
http://hoge.aa0.netvolante.jp
補足
- WordPressの管理画面は、
http://[サーバIP]/wp-admin/にアクセス。 - apacheでサイトを無効にするには、
sudo a2dissite 001-wordpress。 wp-config.phpファイルは重要な情報が書かれているので、セキュリティー上apacheからはアクセス拒否する設定を記述。- 「メディアを追加」からアップロードされたファイルは、ドキュメントルート下の
wp-content/uploads/ディレクトリに格納される。
関連記事


コメント